Sponsored

501A to 502A

Blue22

Well-known member
Joined
Feb 18, 2022
Threads
16
Messages
899
Reaction score
1,089
Location
Southeast, PA
Vehicles
2022 F150 Lariat Sport SuperCrew 5.0L
Did some more work today prepping for the HSW and LED projectors. I pinned the BCM connectors (took my big ass 90 mins to just do those 3 wires) and the I changed the SCCM and steering wheel, for everything buttoned back up and the left side steering wheel controls didn’t work. So I changed the SCCM back to the stock one only to find out my dumbass forgot to do FORScan changes to the SCCM ?. But I ran out of time, I’ll change the SCCM AND update it tomorrow.

I have another tremor LED projector coming this week so I can get the headlamps changed.

Then my last upgrade (still not really planning to do the powered telescoping/tilt steering wheel) will be the rear heated seats. I bought the center console wiring harness that has the rear heated seat connector and the WACM connector in it and will likely tackle that first
Looking forward to seeing your new headlights. I want to do this as well but probably will wait awhile to see if prices come down on the Tremor/BAP headlights. I am hoping with more aftermarket options like Alpharex, Diode Dynamics and Morimoto, that maybe more OEM headlight assemblies will pop up on Ebay.
Sponsored

 
OP
OP

dolsen

Well-known member
First Name
David
Joined
Aug 19, 2022
Threads
20
Messages
2,097
Reaction score
1,938
Location
KY
Vehicles
2022 Rapid Red 701A
Looking forward to seeing your new headlights. I want to do this as well but probably will wait awhile to see if prices come down on the Tremor/BAP headlights. I am hoping with more aftermarket options like Alpharex, Diode Dynamics and Morimoto, that maybe more OEM headlight assemblies will pop up on Ebay.
Yea I think you’re probably correct on that, but it’s a bit hard to gauge. I’m not sure how many people will drop the OEM projectors for less capable aftermarket headlamps. I’m almost certain you’ll see a flood of reflector headlamps though

All in, on the headlamps, I’m at about $1800. This includes the headlamps, wiring harnesses, and HCM. It’s hard to find good quality headlamps (no broken tabs or cracked housings) for under $700 a piece, but if you’re patient, they’re out there.

running the wiring is a bit of a pain, or at least for me, a guy that rarely messes with electrical stuff, it is. But it certainly isnt
 
OP
OP

dolsen

Well-known member
First Name
David
Joined
Aug 19, 2022
Threads
20
Messages
2,097
Reaction score
1,938
Location
KY
Vehicles
2022 Rapid Red 701A
So yesterday instead of worrying about the wiring for the rear heated seats, I put the HSW SCCM back in AND I programmed it in FORScan with my factory as-builts, and guess what... the mf'er worked just fine.

Tomorrow I work a half day and I do not go back to work until the 3rd of Jan. I will have plenty of time and energy to get most, if not all, of the rear heated seats installed, as well as the tremor/BAP projector headlamps (I have a buddy that is going to help me with the wiring for the HSW, but he cannot get to it until after the holidays). The hardest part for me is going to be getting the rear seats taken apart and getting the heating pads installed. I have never messed with any sort of upholstery aside from removing the covers from my couch cushions to wash them haha.

Soon I'll have a 501.8A Lariat.
 
OP
OP

dolsen

Well-known member
First Name
David
Joined
Aug 19, 2022
Threads
20
Messages
2,097
Reaction score
1,938
Location
KY
Vehicles
2022 Rapid Red 701A
So today I got around to installing the center console wiring harness for the rear heated seats. I also installed the switch and plate… so it LOOKS like my truck has rear heated seats now… but I haven’t installed any of the seat heating pads or wiring yet lol. I also installed the WACM, but haven’t enabled it in FORScan yet.

The new harness cost me $108 shipped from ford parts . Com. I’ll share the part number but KNOW that unless your truck is optioned exactly the same as mine, it may not work. The install took me about 3.5 hours from start to finish. If I had to do it again I could probably do it in under 2. I had no idea how to get the cigarette lights port out of the existing plate, and I completely forgot how the cupholder lights were wired. Those two things probably cost me 45 mins.
 
OP
OP

dolsen

Well-known member
First Name
David
Joined
Aug 19, 2022
Threads
20
Messages
2,097
Reaction score
1,938
Location
KY
Vehicles
2022 Rapid Red 701A
No work performed for the last couple days with all of the holiday stuff. I just have to run the two wires for the HSW, I finally got my other BAP/tremor headlamp in so now I have a set of headlamps so I can install those, and the rear heated seat pads need to be installed. It’ll be a damn cold few days though so I’m not sure how much I’ll get to
 

Sponsored

OP
OP

dolsen

Well-known member
First Name
David
Joined
Aug 19, 2022
Threads
20
Messages
2,097
Reaction score
1,938
Location
KY
Vehicles
2022 Rapid Red 701A
New center console harness installation. I figured I should contribute something worthwhile with this thread instead of my hopes and wishes lol.

I’m gonna recall all of this from memory the best I can:

1. move both driver and passenger seats as far back as possible.
2. DS only: remove (1) 7mm screw on the center console panel under the dash. Both sides: remove the L-shaped trim and the matte plastic cover from the center console. The L-shaped trim must be pulled outboard from the center console starting from the rear. I believe there are 6 total clips to pull out, then pull the L-shaped trim towards the back of the vehicle to finish removal. The matte plastic trim has I believe 8 clips
3. Remove (2) 10 mm bolts from each side, one from the front of the console (just under the outboard edge of the HVAC module) and one from the center down by the floor. On the drivers side, disconnect the USB-to-APIM cable, just underneath the outboard edge of the HVAC module. On the passenger side, disconnect the large grey rectangular connector opposite the USB-to-APIM connector (appears to be about a 24 pin connector)
4. Move both front seats all the way forward
5. Remove (1) 10mm bolt from each side of the rear of the console, down towards the floor. This is (6) total 10 mm bolts. These should all be removed manually and not with an impact. There’s blue loc-tite on these and there’s heavy resistance the entire length of the thread, and impact with break the heads off. Disconnect the large black square connector on the floor next to the inboard passenger seat bracket.
5a. If you have the cupholder light installed aftermarket in a 22 or 23, then you also need to disconnect the media bin and cupholder harnesses.
6. At this point the center console should be loose and ready to pull out.

Center console disassembly

1. Open the arm rest. In the back of the arm rest opening, remove the black panel. Simply grab the bottom edge and carefully pull to remove the panel.
2. Remove the (3) 7mm screws exposed from removing the panel
3. Close the center console. Gently and firmly pull the top portion of trim off of the rear cupholder. Remove the cup holder insert. Remove (7) 7mm screws (3 in the cupholder and 4 on top of the cupholder, exposed by removal of cupholder trim. Pull gently and firmly up and back on the lower portion of the cupholder. This should remove the rest of the cupholder assembly.
4. Remove the cupholder/gear shifter trim (cup holders should come with it). Remove the (4) 10mm bolts from the gear shifter and remove gear shifter.
5. Remove the back panel from the back of the center console.

All of this should expose the entire wiring harness. I recommend removing the connectors one at a time and installing the new connectors from the new wiring harness so that you can see how it is routed. Also, I recommend a good metal pry tool to remove the Christmas tree connectors. Also, make sure to change the plate that holds the rear heated seat switch, as well as the switch.
 

harry brown

Well-known member
Joined
Nov 28, 2021
Threads
0
Messages
154
Reaction score
46
Location
USA
Vehicles
mustang 2019
Occupation
tech Consultant
New center console harness installation. I figured I should contribute something worthwhile with this thread instead of my hopes and wishes lol.

I’m gonna recall all of this from memory the best I can:
1. move both driver and passenger seats as far back as possible.
2. DS only: remove (1) 7mm screw on the center console panel under the dash. Both sides: remove the L-shaped trim and the matte plastic cover from the center console. The L-shaped trim must be pulled outboard from the center console starting from the rear. I believe there are 6 total clips to pull out, then pull the L-shaped trim towards the back of the vehicle to finish removal. The matte plastic trim has I believe 8 clips
3. Remove (2) 10 mm bolts from each side, one from the front of the console (just under the outboard edge of the HVAC module) and one from the center down by the floor. On the drivers side, disconnect the USB-to-APIM cable, just underneath the outboard edge of the HVAC module. On the passenger side, disconnect the large grey rectangular connector opposite the USB-to-APIM connector (appears to be about a 24 pin connector)
4. Move both front seats all the way forward
5. Remove (1) 10mm bolt from each side of the rear of the console, down towards the floor. This is (6) total 10 mm bolts. These should all be removed manually and not with an impact. There’s blue loc-tite on these and there’s heavy resistance the entire length of the thread, and impact with break the heads off. Disconnect the large black square connector on the floor next to the inboard passenger seat bracket.
5a. If you have the cupholder light installed aftermarket in a 22 or 23, then you also need to disconnect the media bin and cupholder harnesses.
6. At this point the center console should be loose and ready to pull out.

Center console disassembly

1. Open the arm rest. In the back of the arm rest opening, remove the black panel. Simply grab the bottom edge and carefully pull to remove the panel.
2. Remove the (3) 7mm screws exposed from removing the panel
3. Close the center console. Gently and firmly pull the top portion of trim off of the rear cupholder. Remove the cup holder insert. Remove (7) 7mm screws (3 in the cupholder and 4 on top of the cupholder, exposed by removal of cupholder trim. Pull gently and firmly up and back on the lower portion of the cupholder. This should remove the rest of the cupholder assembly.
4. Remove the cupholder/gear shifter trim (cup holders should come with it). Remove the (4) 10mm bolts from the gear shifter and remove gear shifter.
5. Remove the back panel from the back of the center console.

All of this should expose the entire wiring harness. I recommend removing the connectors one at a time and installing the new connectors from the new wiring harness so that you can see how it is routed. Also, I recommend a good metal pry tool to remove the Christmas tree connectors. Also, make sure to change the plate that holds the rear heated seat switch, as well as the switch.
Great build , best of luck for the rest
 
Last edited:
OP
OP

dolsen

Well-known member
First Name
David
Joined
Aug 19, 2022
Threads
20
Messages
2,097
Reaction score
1,938
Location
KY
Vehicles
2022 Rapid Red 701A
Great build , best of luck for the rest
Thanks, it might be a bit boring compared to some builds, but I’m really excited about every step of this build. There’s a pretty big jump from 501 to 502. I might argue it’s the biggest jump between any two sub-trim levels out all every trim on the F150. Certainly the most expensive jump.
 
OP
OP

dolsen

Well-known member
First Name
David
Joined
Aug 19, 2022
Threads
20
Messages
2,097
Reaction score
1,938
Location
KY
Vehicles
2022 Rapid Red 701A
Today I finally finished the install of the rear heated seats. I watched a couple of katzkin videos before attempting. The job turned out a lot easier than I thought it would. Installing the heated seat pads was about a 6 hour job (removing seats, disassembling seats, installing heat pads, reassembling seats, running wiring, reinstalling seats) and this was with me really taking my time. I bet if I did it again I would be close to 3 hours. Between re wiring the center console and installing the heat pads, I think I have about 10 hours of work in the rear seats.

Huge shoutout to @Jesse-Infotainment for not only providing all part numbers but coming in clutch with some pics to help me see how to run the wires.

There are exactly zero changes required in FORScan (I was curious at first but it was pretty obvious when they worked as installed). Luckily my truck already had the wiring run between the rear heated seat switch in the center console and the C-pillar.

Next up is finishing the install of the projector headlamps, and running the wiring for the HSW.
 
OP
OP

dolsen

Well-known member
First Name
David
Joined
Aug 19, 2022
Threads
20
Messages
2,097
Reaction score
1,938
Location
KY
Vehicles
2022 Rapid Red 701A
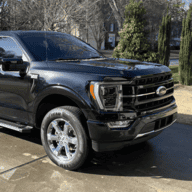
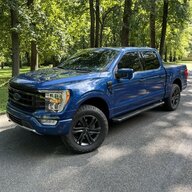
Got my tremor/BAP projector LEDs installed today as well as a copper center grille stripe. I don’t have my forscan cable right now so I couldn’t make the changes needed for the adaptive headlamps, turn signals, or high beams. But the low beams work just fine and it looks fantastic

Ford F-150 501A to 502A E4A0FB9C-32D6-462D-8BCC-50652A0490B3
Ford F-150 501A to 502A 41A7ECFE-276B-4E31-95C5-15EDA5F6EDDA
 

Sponsored


OP
OP

dolsen

Well-known member
First Name
David
Joined
Aug 19, 2022
Threads
20
Messages
2,097
Reaction score
1,938
Location
KY
Vehicles
2022 Rapid Red 701A
I’ve been having trouble with the LED projectors. Initially I made all necessary FORScan updates and I was able to get the low beams, turn signals, and the approach lighting but still didn’t have high beams or the “bending” feature. Turns out my conversion harnesses were wired up incorrectly, each connector needed to have the wire in pin 6 moved to pin 5. This gave me the high beams and bending on the drivers headlamp but the passenger headlamp still isn’t quite working right. Im currently getting a replacement HCM to BCM harness. I may try to remove that harness and see if it looks like it’s pinned correctly.

My truck is safe and driveable, but still isn’t fully functional. No sweat though, I’ll get it fixed.
 
OP
OP

dolsen

Well-known member
First Name
David
Joined
Aug 19, 2022
Threads
20
Messages
2,097
Reaction score
1,938
Location
KY
Vehicles
2022 Rapid Red 701A
Just pulled the trigger on the parts below, LH front and rear ride height sensors and all fasteners, to add the auto level function to the headlamps. I also purchased all of the lamps and wiring to retrofit the factory bed lamps

Ford F-150 501A to 502A 1672861521511
 

JScaro

Well-known member
First Name
John
Joined
Nov 4, 2021
Threads
5
Messages
390
Reaction score
408
Location
Georgia
Vehicles
2021 Ford F150 Lariat 501.5A
Occupation
Beer Drinker
Just pulled the trigger on the parts below, LH front and rear ride height sensors and all fasteners, to add the auto level function to the headlamps. I also purchased all of the lamps and wiring to retrofit the factory bed lamps
I just got my lights working and thought about adding this. Be sure to let us know how it turns out.
 
OP
OP

dolsen

Well-known member
First Name
David
Joined
Aug 19, 2022
Threads
20
Messages
2,097
Reaction score
1,938
Location
KY
Vehicles
2022 Rapid Red 701A
I just got my lights working and thought about adding this. Be sure to let us know how it turns out.
Will do I’m gonna buy molex connectors and build all my own stuff. I think I’m getting to the point that I can do that
 

Blue22

Well-known member
Joined
Feb 18, 2022
Threads
16
Messages
899
Reaction score
1,089
Location
Southeast, PA
Vehicles
2022 F150 Lariat Sport SuperCrew 5.0L
Will do I’m gonna buy molex connectors and build all my own stuff. I think I’m getting to the point that I can do that
Looking forward to the final product. When you are done, you'll have to write up a parts list so someone that also wants to do it, can find them easily.
Sponsored


Top